Slider 1 Slider 2 Slider 3 Slider 4 Slider 5 Slider 6 Slider 6 Slider 7 Slider 5
Showing posts with label CREATIVE🔰. Show all posts

  💌🔰    HOW TO SINGING EASY  🔰💌

   💌🔰    HOW TO SINGING EASY  🔰💌


Published from Blogger Prime Android App

Are You Stuck With the Way You Sing?

You may think that you're stuck with the voice you have, but this isn't true. You can change the way your singing sounds and end up singing better than ever. Sound too good to be true? Well, it's not. Think of it this way. Let's say you want to build muscle in your triceps. You don't like the way your arms look. After checking out a few YouTube videos or getting tips from a bodybuilder, it's clear that you can change your arms' appearance by consistently working on certain exercises. You may need to make some changes in your diet as well, but the exercises are mandatory.

Now, it wouldn't make sense to exercise your thighs if you want to concentrate on your arms. It's the same with the voice. Specific exercises geared to develop areas of the voice are essential to better singing. If singing on key is a weakness, it makes no sense to work on developing a vibrato. How is vibrato going to help to carry a tune?

Several factors are necessary when it comes to singing with a better voice, depending on your present strengths and weaknesses. It's important to focus on the exact areas that need development. Please make it a habit to always warm up your voice before singing. Warm-ups not only prepare your voice to sing better but also help to prevent vocal damage. Warming up your voice will get you ready for singing challenges, resulting in a happier and healthy voice.

I can't possibly cover everything here, but you will learn important vocal techniques (skills) to help you sound better (and in some cases) much better than you do now.

1. Warm-up Your Voice With Humming
Published from Blogger Prime Android App
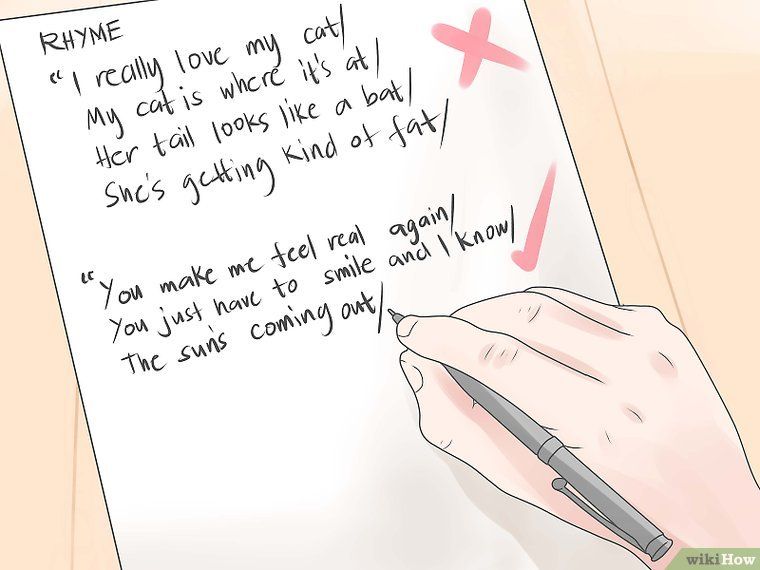
Prepare your voice to sing with a gentle warm-up. There's no better warm-up for your voice than humming, and here's why. Humming prevents vocal strain, is easy and natural, and prevents tension in the tone. It can be done anytime, anywhere. Try this right now:

• Put your lips together gently and hum in a comfortable tone. Feel the buzzing sensation in your lips. This indicates a nice relaxed feeling and sound. It also kicks in the resonating area around the nose. Don't confuse this with singing nasally. It isn't the same thing.

• Repeat several times until the buzzing feeling becomes automatic.

• Beginning with a hum and keeping a relaxed sound, slowly drop the jaw to form an “ah” sound. Now you’re singing, and it should feel easy. Focus on maintaining vibrations around the nasal area.

• Repeat the same exercise changing from an “ah” to an “ee.” Bring your lips to a slight smiling position as you hum to prepare for an “ee.”

What I'm teaching you here is the importance of relieving all tension in the lips, tongue, and jaw as you sing. One reason we dislike our singing is due to tension in our tone. Singing should always feel easy, ringing, and never forced.


2. Drop the Jaw for a More Powerful and Confident Voice

The first area to cover is the way you open your mouth. Sound silly? It's not and here's why:

The mouth is a strong resonator for sound. With the mouth barely open, your singing tone will remain suppressed or hidden-sounding. You want to create enough space for the sound to come out. Don't be self-conscious about a generous mouth opening. How will your tone ring unless your mouth is open enough for the sound to escape? Have you observed a singer up close and personal on television or YouTube? At times, you can almost see the back of their throat.

So give your singing a big boost, by keeping the mouth open as you sing. You will quickly hear a more powerful and better sound. This is no time to be embarrassed. You're a singer and the mouth is part of your singing instrument. But do avoid opening your mouth so wide as to create tension.

To assure that the mouth is open wide enough, place two fingers (one on top of the other) between the top and bottom teeth. Keeping the fingers in the mouth sing 'ah,' then remove the fingers from the mouth while still retaining the 'ah' sound. Did your mouth remain open after removing your fingers?

An exercise to help you to train your mouth and jaw to the right position for singing words using the 'ah' vowel is:

• Using a mirror to monitor for openness, sing the following words in a medium, comfortable tone: hot, brought, not, fall, hall, tall, talk, walk, father, stars, bars, far, and broad. Remember to avoid singing too low or too high. Keep the pitch centered around your speaking voice.

• Be sure to sustain the vowel 'ah' for a few seconds before closing the word with the final consonant. In other words, say you're practicing the word "walk". Sing the first part of this word "WAAAAAH", holding the 'ah' before adding the final consonant, 'K'.

• As you repeatedly practice each word, start off by going very slow. Gradually build your speed until you can sing through the above list at a faster pace.

Tip: How long must you practice? The answer: Until whatever you're working on becomes automatic. Let's say your goal is to remember to drop your jaw each time you sing a word containing the "Ah" vowel. You practice consistently until this goal becomes automatic. You no longer need to concentrate on the mouth position. Everyone is different. Some may see results quickly. For others, it may take a while. Best results are attained by practicing for a few minutes every day as opposed to practicing hour-after-hour, for long periods of time, one or two days a week.


Published from Blogger Prime Android App

3. Breath Control: Learn to Breathe Correctly

The voice cannot work to its full potential unless it's basic energy is not breath. Your singing sound rides on air and it's for this reason you must learn to support your sound by breathing correctly. One reason singers go flat is that the voice is not supported well enough. Belly breathing, or diaphragmatic breathing, is essential to applying the right amount of support. Maybe the following will help you to understand this a little better:

When you begin phonation, (speaking/singing), air causes vibrations to occur within the vocal cords, which produces sound and will continue until you run out of air. If you are currently breathing in the air (inhaling) by using the upper portion of the lungs only, (just the chest) you'll not only run out of air too early but you may also find your sound is weak and breathy. Learning how to inhale by inflating around your waistline takes practice and plenty of it. Don't get discouraged or give up.

You'll need to use this way of breathing to enhance your present voice, extend your vocal range, sing with vibrato, and project your voice.

As you work religiously to learn the belly breathing exercise, you'll learn the right way to breathe. This will bring more life and energy to your singing, helping you to sound more professional. For more help on How to Breathe From the Diagram take a few minutes to add these exercises.


upload by sadeepa

Mobile photography📷


Beginners guide to Mobile Photography- how to take breathtaking photos without a professional camera (Framing and Snapseed)

                Published from Blogger Prime Android App

With the tremendous increase in people inclined towards social media and image sharing apps, better mobile cameras have become a key selling point for most mobile phones. There’s a huge demand for Camera Smart Phones and companies have come up with dual, triple camera setups, telephoto lenses, bokeh modes, portrait modes, AI selfies, and a lot more.

But honestly, any 2017 smartphone’s camera is more than enough in most conditions (except night time). So what is that makes the difference? Why is that some people get amazing photos from their mobile cameras and some just can’t? Trust me your phone camera can do a lot more than you think it can and so can you after reading this article.

It comes down to two simple things- Framing and post-processing.

This article is mainly aimed at naive users without any prior knowledge about photography. I’ll try and keep it as simple as possible and you’ll definitely become better after going through this and post better photos on Instagram, Snapchat, etc.

A lot of people have asked me about how I achieve such images using my phone and coincidentally I've been preparing for my Digital Image Processing semester exam and learned a lot about the technicality of photography, so I thought it’s high time I materialize it.

Before diving into the actual process, let me show you few photos I’ve shot with my Phone (Mi Redmi 4- 13MP, f/2.0) a ~100$ phone and processed in Google’s Snapseed app. All the photos in the article are shot using the same phone unless otherwise mentioned.

Disclaimer 1: None of the devices and apps mentioned in this article have paid me to do so, they’re solely my personal choice and opinion.

Disclaimer 2: I’m partially colorblind (Deuteranopia), which basically means I have trouble distinguishing between closer tones of colors(especially red-green). Excuse me if there is any error while talking about colors


           Published from Blogger Prime Android App

You don’t need a Pixel 2 XL or an iPhone 10 (obviously they have better hardware and software, but you’re paying a premium), the best camera is the one which you have with you. Let’s dive into the process now.

Framing

Framing is the key to any photo, it is how you want people to see your photo but it is very subjective and can take a lot of time to understand and improve. Nonetheless here are a few tips on how to frame your photo better.

1. Symmetry:

Symmetry brings a lot of beauty to a photograph but can be quite challenging sometimes. The Taj Mahal photo shows some degree of symmetry, with the fountain places in the middle of the photo. To make it easier to find symmetry turn on grid-lines on your camera app. It basically divides the frame into 9 boxes (3x3).

Pro tip: Place the subject of interest on one of the intersections (where horizontal and vertical lines meet) as our eyes tend to focus first on these points. This is known as the rule of thirds.


2. Background and foreground:

Most smartphone cameras today have the ability to blur the background (even the ones with a single camera lens setup) which gives us more flexibility to differentiate between the foreground and the background. To do so, tap on the screen where the object is located in the frame.


                  Published from Blogger Prime Android App


Shooting a time-lapse,
Here, after opening my camera app, I tapped on the DSLR which appeared on the screen to change the focus on to it, the background was then blurred. Note that most cameras have a minimum focus distance and cannot focus on objects that are placed too close, in that case, move back a bit.

This pops the object in the foreground and gives it a nice look.

3. Shoot from a different angle:

Shooting from a new angle gives a whole new perspective and meaning to a photo, even if it’s of the same location. It is what makes a difference. It is something most people tend to not see.

For example, look at the below images: The one on the left is what most people see and click, but if you just point it upwards and try to shoot, you get a different (and most of the time, better) image. In case you are having trouble framing it, switch to the front camera (like I did to click this) and shoot it.

Don’t be lazy and try different positions ;)


Miscellaneous tips

If you’re shooting anything other than humans, always shoot in HDR (most camera apps have these options, just dig in your settings)HDR stands for High Dynamic Range. It is the ratio of the brightest light (“whitest white”) to the darkest shadows (“blackest black”) in a shot.

HDR mode basically shoots 3(or more) photos of varying exposure- one underexposed, one normal, one overexposed, and combines them to give a better image and a lot more details, an image closer to what the eye sees.

All of the above are quite subjective and depend majorly on the scene and your eye. But keep them in mind next time you shoot and trust me, you’ll have better-framed photographs.

Let us now look into a less subjective part- Post-processing.

Post-Processing

Oh wait, here’s the part which most people think is cheating, manipulating, etc. TL;DR, it’s not. Most cameras (especially phone cameras) are physically incapable of capturing exactly what you see(yes, there is the camera’s inbuilt post-processing algorithm, but at the end of the day, it’s an algorithm- a set of predefined instructions) so we have to change a few basic properties of the image to make it look like what it’s meant to be.

There are a ton of image enhancement apps available for both Android and iOS, personally I prefer Google’s Snapseed (snapseed apk download touch here)

It has a very neat UI, simple to use yet extremely powerful with loaded features. You can use any other app, what I am about to discuss are common and basic post-processing techniques that do the same thing to an image( Even Instagram has an inbuilt image editor). They only differ in the presets they have inbuilt. I’ll be using Snapseed for this tutorial.


        Published from Blogger Prime Android App


Next @

Click on Tools->Tune Image

Here, you’ll have a lot of options to play around with. I’ll be briefly explaining most of them.

1. Brightness

It is the overall lightness or darkness of an image. Adjusting it would make the image more bright or dark. Use this when the image is dark or too overexposed.


Left to right: Original image,brightness increased, brightness decreased

2. Contrast

Contrast is the difference in color and brightness which makes an object distinguishable. As you can see below, increasing the contrast increases the separation between dark and bright parts of the image, and decreasing does the opposite.


Left to right: Original image, contrast increased, contrast decreased

3. Saturation

Saturation is the amount of white light mixed with a hue( dominant color as perceived by an observed). Increasing saturation increases the separation between colors and vice versa. You get a punchier image if you increase the saturation.


Left to right: Original image, saturation increased, saturation decreased

4. Highlights

Highlights are usually the bright elements of an image, changing this property increases or decreases the intensity of these bright areas. Don’t confuse this with Brightness- which applies to the whole image, whereas Highlights only modifies specific parts.

Notice how the Hills are now more visible when the highlights have been decreased.


Left to right: Original image,highlights increased, highlights decreased

5. Shadows

Shadows are the exact opposite of highlights. When increased, they uncover the areas which were previously dark due to real shadows. Increasing shadows too much can introduce noise, since the image doesn’t contain much information about what is there.

Pro tip: If your camera supports shooting RAW format, which captures a lot more information ( like information about the image in shadows and highlights), use it, but it comes at a cost of larger image size (usually 5–6 times more)


Upload by sadeepa


How  to draw sketch easy👑

How  to draw sketch easy

Published from Blogger Prime Android App(These all sketch  mine)

Drawing is something that can become an emotional outlet for you and something you can get good at only through practice, so let's learn how to draw a bunch of cool new stuff.
                 Precisely , any creative activity, whether it's drawing, painting, crafting, writing, and so on, requires practice.  Without practice, you do not get to learn from mistakes, you do not get to improve.  So, even if you think that you're no good at drawing, we're here to encourage you to get your hands on that pencil and to try.  At least try.

      🔰1.important of shapes
Published from Blogger Prime Android App
Drawing shapes correctly will and enhance the natural objects in your drawings.  The cylinder, which is a combination of cube and sphere, is the perfect shape to learn how to sketch first.  Learning to draw cylinders is essential, particularly in a still life, because an artist is continuously confronted with ellipses found in common items.

      🔰2 know your pencils
Published from Blogger Prime Android App
Having the right  pencil to brgin drawing your pencil sketch is essential.The hardness of the graphite is  indicated on the side of pencil"B" pencils are softer,"H" are harder,and "HB" sits in the middle -  there 's big difference between a 4H and a 4B.but recommend for you "HB"  and 2B  pencil if your are begginner.

        🔰03 vary your lines
Published from Blogger Prime Android App
Use varied lines, . Subtle shifts in the width and darkness of your lines will create a dynamic, visually interesting drawing. Controlling the kind of mark you put down can be tricky in the beginning, but with practice you will be able to create.  a variety of marks that work together to make a cohesive image. Experiment with different pencil grades (from 3H to 6B) and with holding the pencil at different angles.
        🔰04 take control of your pencil
Published from Blogger Prime Android App
If you position your hand closer to the end of the pencil, you have more control and precision, but heavier strokes (darker markings),  Gripping further up the pencil will give you less control and precision, but lighter strokes (lighter markings).

         🔰05 Try different mark- making methods
Published from Blogger Prime Android App

There are plenty of sketching techniques to help you achieve different styles and effects.  Above are some examples demonstrating different ways to create form and depth. It's important to experiment and find what works best for you, to not only complement but enhance your style.While I prefer smoother value transitions with the pencil strokes blending in against a thin outline, you may be more partial to cross-hatching against a bold outline.

          🔰06 Make it symmetrical
Published from Blogger Prime Android App

I like symmetrical drawings, but they often look boring all too quickly.A good way to prevent this is to add some subtle changes and only keep the general lines symmetrical instead of mirroring every small part. Keeping some elements asymmetrical helps to avoid boring repetition.


         🔰07 Use a blending stick for smooth shading 
  Published from Blogger Prime Android App         🔰

It is possible to create smooth, blended effects using pencils - for example, to capture a sky.Sometimes it's preferable for your shading to be less sketchy and more smooth and subtle.Pencil lines don't blend perfectly unless you're very careful. To avoid your initial scribbles showing through,Use spare paper to doodle a big swatch of soft graphite or charcoal pencil, then use a large blending stick to pick up the soft dust to use for your image.Keep using the blending stick and adding more ribbles as you need more graphite. You can then build up darker areas to create definition.  

    〽Watch video 👑  you can try


Published from Blogger Prime Android App
( sherlock holmes series )
Published from Blogger Prime Android App

Five feet apart film

Published from Blogger Prime Android App

(World war 2)


🔰Show your abilities

👑Written & designed by sadeepa dewmith ,

How to write lyrics simply

 How to  write  lyrics simply 


The art of songwriting combines many skills.In terms of music, a songwriter  or songwriting team must tackle song structure , melody, harmony,rhythm and instrumentation.Beyond these musical components , songwriters must also tackle lyric writing.while there's no unifying secret to writing.great lyrics,developing a writing process can keep you focused  from the frist line the last.

[Following  few tips]
Published from Blogger Prime Android App


1 .  Don't be scared  of imagery

Don't feel that  using  imagery will make your  lyrics too arty or flowery.used well , It can evokr emotions or moods that can't be created by using blunt description  alone.It is advisable to use catchy words.
Example  :-

Another day 🌿
another life✨
I changed when I smelled a flower🌼
It's complicated feeling Incomprehensible🌹


2 .  Elevator pitch

Try to have a clear idea  of what the song is about.you should be able to sum up  the essence of  the song in one sentence.


Example :-

She  is the lighthouse  in night
               that will
Safety guide me home
And I'm not scared  of passing over


3 Use context


Adding back- story to explain the  situation  can add interest, and  can change the entire meaning  of any lyrics following it.I recommend for read ed sheeran's lyrics.he is great  song writer .

Published from Blogger Prime Android App   drawn by me


Try  to listen  ed sheeran  supermarket flower  sentimental song.
4  be clear
Published from Blogger Prime Android App

Remember  that the listeners might  miss a word or line,or three.Don't  rely on just one small line to put  the  whole song in context.


5  Experiment with pronounces

Songs do always  have to be written using  ' you'  o 'I ' . Lyrics  with plural pronouns such  as 'we' and  ' they ' for example, can give  ax  very  different feel to a song.avoid using too many different pronouncs in  the same song though  as  this may  be  confusing .


Example :-


I found a angel who met me today
but I need love for share my stories
I saw your love in your eyes
We can deal  our dreams together


6 Avoid filler
Published from Blogger Prime Android App
If  possible , avoid  writing filler lines  in order to make rhythm work.It'  s   fine to use filler when mapping out the structure of the song, but yo should  use any subsequent re -  writes to try and make each line count in is own right.

write  lyrics  from your own experience .
Published from Blogger Prime Android App
As obvious as it may sound,some of history's  greatest  songs are about  personal  experiences,with artists drawing on real -  life events and  traumas to spark their creativity.whether you have been hard times or great times,you can use your life experiences to great  affect.

On  the pitch

She's cuddle and loving me 😊
Like we're resembling  teddies  on the sofa
my eyes are closed And I'm feel warm .

On the pitch, where we  lay👒👒
I wanna stay inside all day
And it's cold outside, again
And
we're both so high😇

We could fly to hortant, kandy  or chilaw
We can go where you want Say the word and I'll take ya
(example )
[ C / A/ G]

Success is  stumbling from failure to failure with no loss of enthusiasm.

Written by

sadeepa dewmith
@art
Thank  you for read👑

how to find my hobbies

Spend your time with hobbies 


Having a hobby us great way relieve stress  ,a creative outlet and  a way to meet new people .In fact
,there are lots of ways hobbies  are good for you.but if you don't have a regular leisure activity that you enjoy ,it can be difficult to decide which  one tips for finding  for you.here some tips for finding  an interest  that fits your personality and interests.


1.You must have a confidence.

Published from Blogger Prime Android App

The only guarantee for failure is  to stop trying and  success is stumbling to failure with no loss enthusiasm. Always keep your mind.


2.what is a hobby ?
Published from Blogger Prime Android App                Published from Blogger Prime Android App

Hobbies are simply anything you do that 's for fun.you aren't getting  pain to do it, it is something you like to do with your free time that helps you decompress and connect with other people.for  a lot of people these days it seems like their  onlt leisure activities are watching  television and catching up on facebook .climbing to collecting silver spoons can have real bemfits.glimpse on the future  many student addicted to mobile games. They lost their auspicious free time . Time is gold.


3.why  hobbies are important ?

Published from Blogger Prime Android App             Published from Blogger Prime Android App

Hobbies often provide a creative outlet that you might  not get in your everydaylife.thay allow you to do something  that's just for you,that can help you forget your daily problems, unwind aftee hars day give you lot of pleasure .
If you can find like minded people in your area,an out pursuit can also be a great way  to meet new people and experience new adventures ,whether that 's taking  on a new trail or going  to a knitting  convention.


4.reclaim  your childhood interest

Published from Blogger Prime Android App

Think about  the hobbies  you used  to enjoy before work, lifd and # adulting git in the way
When you were a kid,what did you like to do / did you spend hours finger-  painting masterpiece to hang on fridge ?If  so class Were you constantly getting  dressed in costume and putting  in shows for your friends ?  Then may be you can check  out a  local  acting troupe.


Now I am going to talking about important  of  hobbies

1.It makes  you more interesting :-  people who have hobbies  have experience and  stories  that     they   can share  with others.they also specialized knowledge that yhey can teach to anyone  who also has  an    interest in the same topics  as they do
              
Published from Blogger Prime Android App


2.It  increases  your knowledge  :- alone with building skills, you new knowledge  throught the       developet of hobbies.

Published from Blogger Prime Android App


It challenges you  :-  when  you pick new hobby,you will involved in activities that  are novel   and challenging  .if you don't find your hobby challenging ,then you also won't find it engaging,and it will be less enjoyble.that means you need  to find  a better  hobby.

Published from Blogger Prime Android App

Written by 

sadeepa dewmith 
@art
Thank  you for read👑


Make painting rocks a hobby

Make painting rocks a hobby

Painting rocks is one of my favourite hobby which I do in my leisure times. Actually this is so easier than you are imagining. Rocks are great canvases for painting. There are different shapes and sizes of rocks. The only thing you want to, BE CREATIVE! and PLAY WITH COLOURS THE WAY YOU WANT! Okay, let’s see,

There are simple things which we want,


1.Rocks- Better to find smooth and round rocks,  but it  doesn’t  matter if they have rough  surfaces too.
2.Paints- Any quality paint that is insoluble in water(Acrylic, Fabric paints ,pens, markers,...)   
3.Brushes- Better to use small sizes brushes. 
 If you want, You can use a sealer as well for a better result.

So, don’t need to spend a lot of fortune on these.                                   

Note:- Make sure that before painting, wash rocks and let them dry.


                       These are some of my works.

Well, in my experience, once you start painting, you will be addicted to this because it’s such an awesome hobby. Now you can give them as gifts and also they’re great for selling.( Currently painted rocks is good way to make money because many people love looking at them and buying them).

SO,TRY and ENJOY!!! and tell me WHAT YOU DID.


Written By,

Nithu 😊.


Copyright © 2013 WOTSAN CASTLE and Blogger Themes.